Authentication
Setting up auth in Zero apps has the following steps:
- Set
userIDon the client - Define the
Contexttype for permissions - Implement query and mutate endpoints
- Log out
Set userID on Client
Your app will already know the logged-in user from whatever auth provider you use. Pass this userID to Zero on construction:
import {ZeroProvider} from '@rocicorp/zero/react'
return (
<ZeroProvider userID={userID}>
<App />
</ZeroProvider>
)If the user is logged out, omit userID, or set to undefined / null:
import {ZeroProvider} from '@rocicorp/zero/react'
return (
<ZeroProvider userID={null}>
<App />
</ZeroProvider>
)Zero uses the userID field to segregate the client-side storage for each user. This allows users to quickly switch between multiple users and accounts without resyncing.
If you have more than one set of Zero data per-user (i.e., for different apps in the same domain), you can additionally use the storageKey parameter:
const opts: ZeroOptions = {
// ...
userID: 'user-123',
storageKey: 'my-app'
}If specified, storageKey is concatenated along with userID and other internal Zero information to form a unique IndexedDB database name.
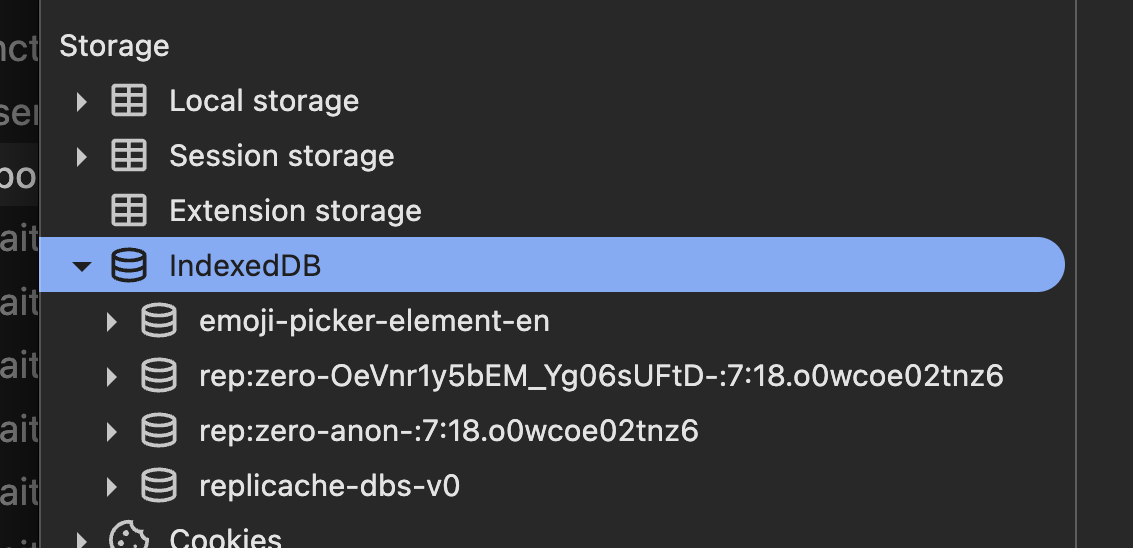
Zero's IndexedDB databases are prefixed with 'rep' or 'replicache' because reasons.
Define the Context Type
When a user is authenticated, you will want to know who they are in your queries and mutators to enforce permissions.
To do this, first define a Context type that includes the user's ID and any other relevant information, then register that type globally with Zero:
export type ZeroContext = {
id: string
}
declare module '@rocicorp/zero' {
interface DefaultTypes {
context: ZeroContext
}
}Then pass an instance of this context when instantiating Zero on the client:
const opts: ZeroOptions = {
// ...
userID: 'user-123',
context: {
id: 'user-123'
}
}If your app also supports guest access, allow Context to be undefined (or null) when the request is unauthenticated, and pass undefined or null for the userID.
declare module '@rocicorp/zero' {
interface DefaultTypes {
context: ZeroContext | undefined
}
}
const opts: ZeroOptions = {
// ...
userID: undefined,
context: undefined
}Send Credentials
Both cookies and tokens are supported.
Cookies
The most common way to authenticate Zero is with cookies.
To enable it, set the ZERO_QUERY_FORWARD_COOKIES and ZERO_MUTATE_FORWARD_COOKIES options to true:
# ... other env vars
export ZERO_QUERY_FORWARD_COOKIES="true"
export ZERO_MUTATE_FORWARD_COOKIES="true"
# run zero-cache, e.g. `npx zero-cache-dev`Zero-cache will then forward all cookies sent to cacheURL to your mutators and queries endpoints. Cookies will show up in the normal HTTP Cookie header and you can authenticate these endpoints just like you would any API request:
// src/routes/api/zero/query.ts
import {createFileRoute} from '@tanstack/react-router'
export const Route = createFileRoute('/api/zero/query')({
server: {
handlers: {
POST: async ({request}) => {
const session = await authenticate(
request.headers.get('Cookie')
)
// ... handle query ...
}
}
}
})Cookie Deployment
In order for cookie auth to work, the browser must send your frontend's cookies to zero-cache, so that zero-cache can forward them to your API.
During development, this works automatically as long as your frontend and zero-cache are both running on localhost with different ports. Browsers send cookies based on domain name, not port number, so cookies set by localhost:3000 are also sent to localhost:4848.
For production you'll need to do two things:
- Run
zero-cacheon a subdomain of your main site (e.g.,zero.example.comif your main site isexample.com). Consult your hosting provider's docs, or your favorite LLM for how to configure this. - Set cookies from your main site with the
Domainattribute set to your root domain (e.g.,.example.com). If you use a third-party auth provider, consult their docs on how to do this. For example, for Better Auth, this is done with thecrossSubDomainCookiesfeature.
Tokens
Zero also supports token-based authentication.
If you have an opaque auth token, such as a JWT or a token from your auth provider, you can pass it to Zero's auth parameter:
import {ZeroProvider} from '@rocicorp/zero/react'
return (
<ZeroProvider userID={userID} auth={token}>
<App />
</ZeroProvider>
)Zero will forward this token to your mutators and queries endpoints in an Authorization: Bearer <token> header:
// src/routes/api/zero/query.ts
import {createFileRoute} from '@tanstack/react-router'
export const Route = createFileRoute('/api/zero/query')({
server: {
handlers: {
POST: async ({request}) => {
const session = await authenticate(
request.headers.get('Cookie')
)
// ... handle query ...
}
}
}
})Implement API Endpoints
Create a Context object from the validated credentials and pass it to your query and mutator functions.
Query
// src/routes/api/zero/query.ts
import {createFileRoute} from '@tanstack/react-router'
import {handleQueryRequest} from '@rocicorp/zero/server'
import {mustGetQuery} from '@rocicorp/zero'
import {queries} from 'queries.ts'
import {schema} from 'schema.ts'
export const Route = createFileRoute('/api/zero/query')({
server: {
handlers: {
POST: async ({request}) => {
const session = await authenticate(
request.headers.get('Cookie')
)
const result = await handleQueryRequest({
handler: (name, args) => {
const query = mustGetQuery(queries, name)
return query.fn({
args,
ctx: session?.user
})
},
schema,
request,
userID: session?.user?.id
})
return Response.json(result)
}
}
}
})Mutate
// src/routes/api/zero/mutate.ts
import {createFileRoute} from '@tanstack/react-router'
import {handleMutateRequest} from '@rocicorp/zero/server'
import {mustGetMutator} from '@rocicorp/zero'
import {mutators} from 'mutators.ts'
import {dbProvider} from 'db-provider.ts'
export const Route = createFileRoute('/api/zero/mutate')({
server: {
handlers: {
POST: async ({request}) => {
const session = await authenticate(
request.headers.get('Authorization')
)
const result = await handleMutateRequest({
dbProvider,
handler: transact =>
transact((tx, name, args) => {
const mutator = mustGetMutator(mutators, name)
return mutator.fn({
args,
tx,
ctx: session?.user
})
}),
request,
userID: session?.user?.id
})
return Response.json(result)
}
}
}
})Updating Tokens
If you are using token auth and the user stays signed in as the same user, you can update the token without recreating Zero:
const nextToken = await fetchNewToken()
await zero.connection.connect({auth: nextToken})When called while connected, Zero refreshes server-side auth context and re-transforms queries without reconnecting. The new token is also reused for later reconnects.
Use this only to refresh credentials for the current user. For logging out or logging in as a different user, recreate Zero with the new userID and auth values instead.
Auth Failure and Refresh
To mark a request as unauthorized, return a 401 or 403 status code from your queries or mutators endpoint.
const session = await authenticate(
request.headers.get('Authorization')
)
if (!session) {
// can be 401 or 403
return Response.json(
{error: 'Unauthorized'},
{status: 401}
)
}
// handle mutate/query request ...This will cause Zero to disconnect from zero-cache and the connection status will change to needs-auth. For cookie auth, refresh the cookie and call zero.connection.connect(). For token auth, fetch a new token and call zero.connection.connect({auth: newToken}).
function NeedsAuthDialog() {
const connectionState = useConnectionState()
const refreshCookie = async () => {
await login()
// no token needed since we use cookie auth
zero.connection.connect()
}
if (connectionState.name === 'needs-auth') {
return (
<div>
<h1>Authentication Required</h1>
<button onClick={refreshCookie}>Login</button>
</div>
)
}
return null
}Or, if you are using token auth:
function NeedsAuthDialog() {
const connectionState = useConnectionState()
const refreshAuthToken = async () => {
const token = await fetchNewToken()
// pass a new token to use when reconnecting to zero-cache
zero.connection.connect({auth: token})
}
if (connectionState.name === 'needs-auth') {
return (
<div>
<h1>Authentication Required</h1>
<button onClick={refreshAuthToken}>Login</button>
</div>
)
}
return null
}Permission Patterns
Zero does not have (or need) a first-class permission system like RLS.
Instead, you implement permissions by authenticating the user in your queries and mutators endpoints, and creating a Context object that contains the user's ID and other information. This context is passed to your queries and mutators and used to control what data the user can access.
Here are a collection of common permissions patterns and how to implement them in Zero.
Read Permissions
Only Owned Rows
// Use the context's user ID to filter the rows to only the
// ones owned by the user.
const myPosts = defineQuery(({ctx}) => {
return zql.post.where('authorID', ctx.id)
})Owned or Shared Rows
// Use the context's user ID to filter the rows to only the
// ones owned by the user or shared with the user.
const allowedPosts = defineQuery(({ctx}) => {
return zql.post.where(({cmp, exists, or}) =>
or(
cmp('authorID', ctx.id),
exists('sharedWith', q => q.where('userID', ctx.id))
)
)
})Owned Rows or All if Admin
const allowedPosts = defineQuery(({ctx}) => {
if (ctx.role === 'admin') {
return zql.post
}
return zql.post.where('authorID', ctx.id)
})Deny by Returning No Rows
Read permissions in Zero are filter-based. If a user should not be able to see any rows for a query, return a query that matches no rows instead of throwing an error.
// The empty `or()` expression is always false,
// so this returns no rows.
const myPosts = defineQuery(({ctx}) => {
if (!ctx?.id) {
return zql.post.where(({or}) => or())
}
return zql.post.where('authorID', ctx.id)
})Write Permissions
Enforce Ownership
// All created items are owned by the user who created them.
const createPost = defineMutator(
z.object({
id: z.string(),
title: z.string(),
content: z.string()
}),
(tx, {ctx, args: {id, title, content}}) => {
return zql.post.insert({
id,
title,
content,
authorID: userID
})
}
)Edit Owned Rows
const updatePost = defineMutator(
z.object({
id: z.string(),
content: z.string().optional()
}),
(tx, {ctx, args: {id, content}}) => {
const prev = await tx.run(
zql.post.where('id', id).one()
)
if (!prev) {
return
}
if (prev.authorID !== ctx.id) {
throw new Error('Access denied')
}
return zql.post.update({
id,
content
})
}
)Edit Owned or Shared Rows
const updatePost = defineMutator(
z.object({
id: z.string(),
content: z.string().optional()
}),
(tx, {ctx, args: {id, content}}) => {
const prev = await tx.run(
zql.post
.where('id', id)
.related('sharedWith', q =>
q.where('userID', ctx.id)
)
.one()
)
if (!prev) {
return
}
if (
prev.authorID !== ctx.id &&
prev.sharedWith.length === 0
) {
throw new Error('Access denied')
}
return zql.post.update({
id,
content
})
}
)Edit Owned or All if Admin
const updatePost = defineMutator(
z.object({
id: z.string(),
content: z.string().optional()
}),
(tx, {ctx, args: {id, content}}) => {
const prev = await tx.run(
zql.post.where('id', id).one()
)
if (!prev) {
return
}
if (ctx.role !== 'admin' && prev.authorID !== ctx.id) {
throw new Error('Access denied')
}
return zql.post.update({
id,
content
})
}
)Logging Out
When a user logs out, you should recreate Zero without userID, and consider what should happen to the synced data.
If you do nothing, the synced data will be left on the device. The next login will be a little faster because Zero doesn't have to resync that data from scratch. But also, the data will be left on the device indefinitely which could be undesirable for privacy and security.
If you instead want to clear data on logout, use zero.delete():
await zero.delete()This immediately closes the Zero instance and deletes all data from the browser's IndexedDB database.